Renovating an Imperia circular sock machine
Through one of my fellow members of the Woolly Umbrella spinning group I was asked if I would help renovate a vintage sock machine. The machine is part of the Stanmer Preservation Society collection and they hoped it could be got working for their Heritage Week this week. Sue sent me a photo of the … Continue reading Renovating an Imperia circular sock machine

Through one of my fellow members of the Woolly Umbrella spinning group I was asked if I would help renovate a vintage sock machine. The machine is part of the Stanmer Preservation Society collection and they hoped it could be got working for their Heritage Week this week.
Sue sent me a photo of the manual, but with little info on the machine apart from. ‘It worked a few years ago’, I was in the dark.

So today I packed a range of tools, oil and cloths etc and set off for Stanmer not sure what I would find. The machine was in a sad state. Not really bad, and most of the parts seem to be there, but it was pretty rusty. It seems to have been left uncovered and un-oiled in a damp shed for the last few years so had a thick layer of dust along with the rust.
Luckily the instruction manual is with the machine, but there is no maintenance manual. Having used one of these before I know the general points about it, but not the precise specifics. A quick YouTube trawl found some useful videos and it was time to tackle the job.
The rib dial was not attached and I didn’t want to address that in this session. My aim was to get the machine working well single bed first. So the rib dial stayed in the somewhat dusty and rusty spares box for now.
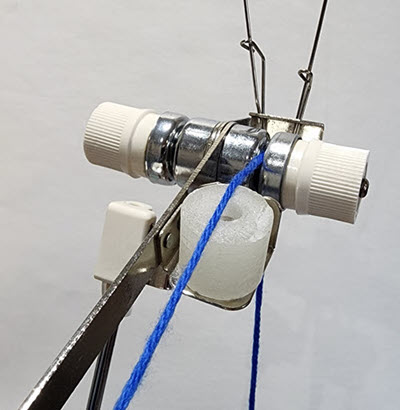
A thorough dusting helped a bit, but there was no air hose or even a vacuum cleaner so it was down to cloths and some blowing and picking the dust out of cracks. I dismantled the top tension and removed the yarn feeder. That was a bit rusty so some gentle fine emery paper was needed to clean it up. Next came removing the spring to allow the needles to be taken out and the dial removed. Most needles were slightly rusty on the hook if not the shaft as well, so I gently emery papered the bad areas and then soaked them in surgical spirit and oil for a while. Two broken and two bent needles were rejected at this point as too far gone to salvage. Meanwhile the cams were now revealed and could now be inspected and cleaned.
Once all seemed OK, if not in perfect condition, I reassembled the machine. Some needles still felt sticky, so it was a matter of replacing them one by one in the jamming areas to eliminate bad ones.

Time to cast on with that horrible little ‘daisy’ claw tool. A job that I hate, but went OK in fact. Sticky latches caused several repeating ladders and miss stitching, but after some use, and easing the latches it began to knit properly. Only one needed to be replaced before the whole dial would work! So satisfying.
I want to get the machine knitting a reciprocating sock heel before I tackle the rib dial, but if that goes well next time, I hope to be able to tackle the rib dial after that. There seem to be some spare needles for the rib dial, but not sure if there are enough. We will see…
I’ve marked the dial into quarters; the half way mark was already filed of the needle truck. So far it’s working for a creating the heel, but returning the needles to work causes holes.
We took it to pieces again in better light, and found that the cam is a little with on one end, but I’m not sure that’s the problem.

What's Your Reaction?


