How To Make Unique Machine Embroidery Design – 4 Leaf Clover Banner – 90
Welcome to my latest tutorial where we dive into creating a unique machine embroidery design for St. Patrick’s Day! Today, I’ll guide you through the step-by-step process of making a charming 4 leaf clover banner, perfect for adding festive flair to your home decor. Whether you’re a beginner or looking to refine your skills, this... The post How To Make Unique Machine Embroidery Design – 4 Leaf Clover Banner – 90 appeared first on Karlie Belle.
 nikhil

Welcome to my latest tutorial where we dive into creating a unique machine embroidery design for St. Patrick’s Day! Today, I’ll guide you through the step-by-step process of making a charming 4 leaf clover banner, perfect for adding festive flair to your home decor. Whether you’re a beginner or looking to refine your skills, this project is designed for everyone to enjoy.
Introduction to the Project
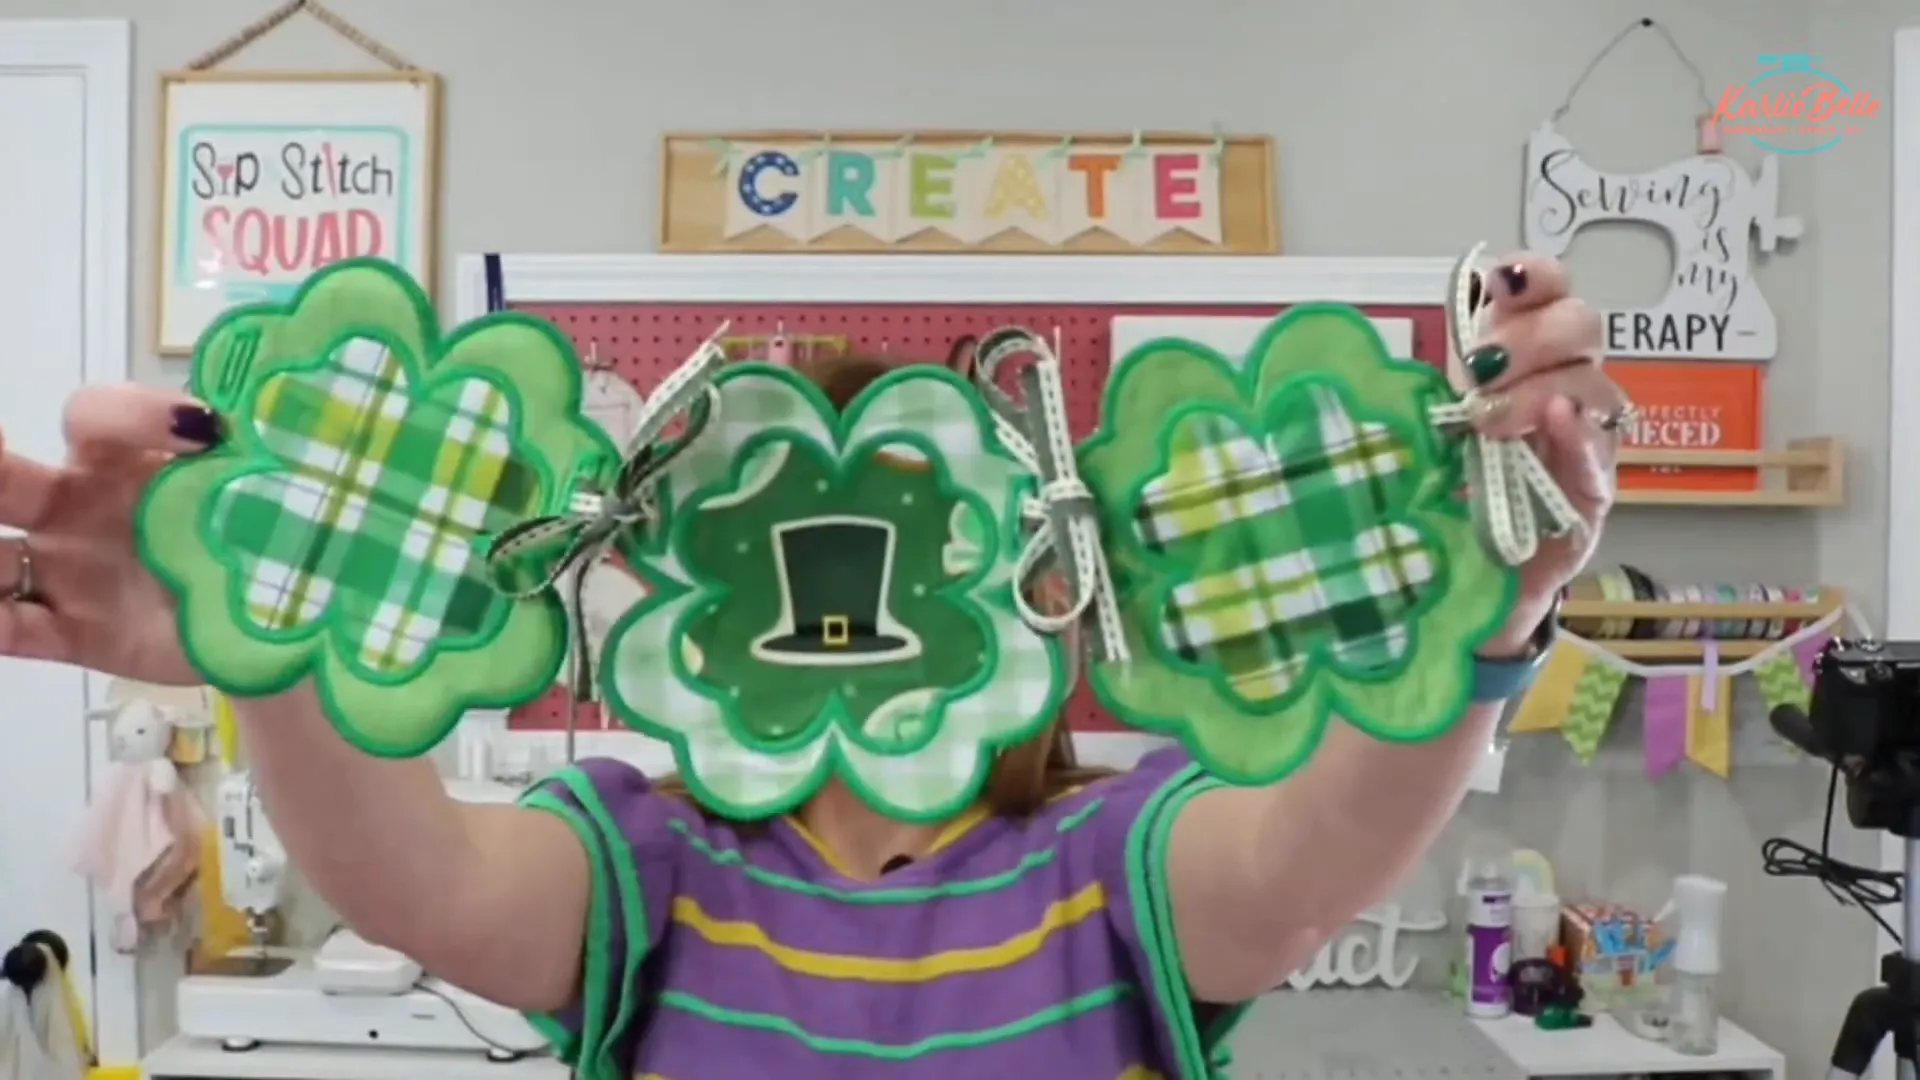
I love to make home decor items with my embroidery machine. With St. Patrick’s Day coming up, I went out to look for something new to hang from my fireplace and I found this very cute 4 leaf clover banner design from BigDreamsEmbroidery on Etsy. I love how it has a finished satin edge and that I can change the fabric for each clover if I want or keep it consistent. This is a great beginner in the hoop project and is available in multiple sizes. I will be using my Brother PE800 (newer version is the PE900) for this project, however it can be made on any machine!
I will also go over how to personalize this banner with lettering using Embrilliance Essentials  .
.
Supplies Needed
- 4 Leaf Clover Banner
- Embrilliance Essentials
- Sew n Wash Stabilizer Use coupon code “karliebelle” to save 10%
- Up to 3 different fabrics for each 4 leaf clover
- Optional extra layer to add more structure
- Cut Away Stabilizer Use coupon code “karliebelle” to save 10%
- SF101 Use coupon code “karliebelle” to save 10%
- Flex Foam
- Heat n Bond Lite Use coupon code “karliebelle” to save 10%
- Cricut Mini Easy Press
- Clover Stiletto Use coupon code “karliebelle” to save 10%
- Applique Scissors Use coupon code “karliebelle” to save 10%
- Organ 75/11 BP Needles Use coupon code “karliebelle” to save 10%
- Precision Tweezers Use coupon code “karliebelle” to save 10%
- Embroidery Thread Use coupon code “karliebelle” to save 10%
- Pre-wound Bobbin
- Thread Stand Use coupon code “karliebelle” to save 10%
- Seam Ripper
- Ribbon
Choose Banner Size
For this project, we’re focusing on a charming 4-leaf clover banner, available in multiple sizes (4″, 5″, and 6″). If your embroidery machine has a smaller field, like 4×4 inches, simply select the 4-inch clover. Today, I’ll be working with a 5-inch clover on my Brother PE800, but the process remains the same regardless of size.

Getting to Know Your Machine
For those using a Brother PE800, you’ll appreciate its user-friendly interface and maximum embroidery field of 5×7 inches. This model is an excellent choice for beginners, offering quality features without breaking the bank. Although it’s discontinued, the newer PE900 model comes with fantastic upgrades, like cutting jump stitches and wireless capabilities. If you have a PE900, let me know if you’d like tutorials specific to that machine!

Preparing Your Fabric
Let’s talk fabric prep. For the outer clover, iron on Shape Flex or a similar interfacing to give it some body. For the inner clover, apply Heat and Bond Lite to create a double-sided adhesive—this ensures your fabric stays put during stitching.
Hooping

One of the joys of in-the-hoop projects is the simplicity of hooping. Simply place your stabilizer in the hoop—no need to worry about fabric placement just yet. Once you’ve hooped your stabilizer, it’s time to stitch!
Preparing the Machine
With our supplies in hand, it’s time to prepare the embroidery machine. Ensuring your machine is set up correctly is crucial for a smooth stitching process.

Setting Up Your Machine
- Threading: Begin by threading your machine with your chosen thread color. Make sure to use a vertical thread stand to prevent tension issues.
- Hooping: Use a 5×7 hoop with two layers of wash-away stabilizer. This will provide the necessary support and structure for your embroidery.
- Loading the Design: Insert your USB stick into the machine and navigate to your clover design. Select the size that fits your machine’s embroidery field.
Loading the Design
Once your machine is ready, it’s time to load the beautiful 4-leaf clover design. This step ensures that your machine knows exactly what to stitch.
Step-by-Step Design Loading

- Insert USB: Plug your USB stick into the machine’s port.
- Select Design: Use the machine’s interface to browse and select your clover design. Ensure you choose the correct size for your hoop.
- Adjust Settings: Check your machine settings, ensuring the design is correctly centered and oriented.
- Start Position: Position the hoop and stabilize it securely on the machine.
Placement Stitch
Now that everything is set up, we begin the embroidery process with the placement stitch. This stitch outlines where to place your fabric.
Executing the Placement Stitch
- Lower the Presser Foot: Ensure the presser foot is lowered to engage the machine.
- Start Stitching: Press the start button. The machine will stitch a simple outline, indicating where to place your fabric.
- Tip: Use this time to prepare your fabric pieces, ensuring they are cut to size and ready for placement.

With the placement stitch complete, we’re ready to move on to the next exciting steps in this unique machine embroidery design project. Stay tuned for more detailed instructions as we continue crafting our festive banner!
Cutting the Clover Fabric
Before we dive into the detailed process of applique and stitching, let’s start by cutting the clover fabric. This is a crucial step in creating your unique machine embroidery designs, as it sets the stage for the rest of the project.

Adding Extra Stabilization
To give your fabric the necessary support, stabilize it using Pellon SF101. This adds structure and prevents puckering during embroidery. If you desire additional firmness, place a piece of cutaway stabilizer underneath the fabric.

Choosing the Right Fabric
First, pick a fabric that suits the theme of your banner. For this project, a vibrant green fabric works wonders to capture the spirit of St. Patrick’s Day. Ensure that the fabric is slightly larger than the clover outline to allow for trimming.

Tack Down Stitch
After securing everything in place, sew the tack down stitch on the machine. This will secure your applique fabric in place.

Trimming the Applique
With the fabric tacked and secured, it’s time to trim the applique. This step is essential to ensure that the fabric fits perfectly within the stitched outline. If you added cutaway stabilizer to add firmness to your clover, you will also trim this just like your applique fabric.
Using Applique Scissors
Applique scissors are your best friend here. They allow for precise cutting without the risk of snipping the stitch line. Carefully lift the fabric and trim as close to the outline as possible.
Remember, practice makes perfect. Don’t worry if your first few trims aren’t perfect; you’ll improve with each attempt. The satin stitch will cover any minor imperfections.

Placement and Tack Down for the Inner Clover
With the first applique neatly trimmed, we move on to the inner clover. You will repeat the process of placement stitch, add your fabric that has Heat n Bond on the back, then do the tack down stitch.

Trim the applique fabric.

During this step, use a mini iron to adhere the applique with Heat and Bond Light, ensuring it stays in place for the final satin stitching.

Executing the Satin Stitch
Ensure your machine is threaded with the appropriate color. For the inner clover, a contrasting color like white against a green fabric can create a striking effect. Lower the presser foot and begin the satin stitching process. The machine will meticulously cover the raw edges of the applique, creating a smooth finish.

Adding the Back Fabric
Now, let’s add the back fabric to give your banner a professional finish. This step ensures that the back of your embroidery looks just as neat as the front.
Preparing the Back Fabric
Select a fabric for the back that complements the front. Cut it slightly larger than the clover design. This piece will be trimmed later for a clean finish.


Securing the Back Fabric
Turn the hoop over and place the back fabric over the design. Use a low-tack tape to secure it in place, ensuring it doesn’t shift during stitching.

Be cautious when handling the hoop to avoid dislodging the fabric. Once secured, the machine will stitch the outline to tack down the back fabric. Remove the hoop from the machine and turn onto the back side. Trim the back piece of applique.

Final Satin Stitch and Buttonholes
We’re on the home stretch! The final satin stitch and buttonholes will complete your unique machine embroidery design, adding a polished edge and functionality for hanging.
Switching Bobbins
For the final satin stitch, switch your bobbin to match the top thread color. This ensures a seamless look on both sides of the banner.

Executing the Final Satin Stitch
With the bobbin switched, begin the final satin stitch. This step takes time, as it covers the entire outer edge of the clover, ensuring a durable and decorative finish.

Creating Buttonholes
The last step is stitching the buttonholes. These allow you to thread a ribbon through, making it easy to hang your banner. Ensure the buttonholes are evenly spaced and stitched securely. Once complete, trim any excess threads and admire your handiwork!

Finishing Touches
Now that we’ve completed the intricate embroidery and applique work, it’s time to focus on the finishing touches that will bring our unique machine embroidery design to life. These final steps ensure that our banner is not only beautiful but also durable and ready for display.
Cleaning Up the Stitches
After removing the banner from the hoop, you’ll notice a few loose threads and tails. These are completely normal and can be easily tidied up. Use a pair of small scissors to carefully snip away any excess threads without cutting the stitches themselves. This will give your banner a neat and professional look.
Removing the Stabilizer
The next step is to remove the wash-away stabilizer. Begin by trimming the stabilizer close to the stitches with your scissors, being cautious not to cut the fabric or stitches. Once trimmed, gently wet the edges of the banner using a Q-tip or a small paintbrush dipped in water. This will help dissolve the stabilizer, leaving you with a clean edge.

For any stubborn bits of stabilizer, continue to rub gently until they dissolve completely. This process might get a bit sticky, so take your time to ensure all the stabilizer is removed for a smooth finish.

Creating Holes for the Ribbon
With the stabilizer gone, it’s time to make holes for threading the ribbon. These holes will allow the banner to be strung together and hung beautifully.
Using a Seam Ripper
To create holes, use a seam ripper to carefully puncture through the fabric just under the top satin stitch. Make sure to do this gently to avoid damaging the stitches. This opening should be wide enough for your chosen ribbon to pass through.

Tying the Bows
Now comes the fun part—tying the bows! This step adds a delightful finishing touch to your banner and allows for creativity in presentation.
Threading and Tying
Cut your ribbon into 15-inch lengths to ensure you have enough material to tie a neat bow. Thread the ribbon through the holes you’ve created, leaving enough slack to tie a bow. For a more playful look, tie the ribbon into bows at each connection point between the clovers.

Feel free to adjust the spacing of the clovers as you tie the bows, ensuring they are evenly distributed. Satin ribbons tend to create more polished bows, but any ribbon that suits your theme will work beautifully.

Displaying Your Finished Banner
With your banner complete, it’s time to decide where to display it. The vibrant colors and intricate designs make it a perfect addition to any room.
Choosing a Location
Consider hanging your banner in a prominent spot where it can be easily admired. Door frames, mantels, or above a window are all excellent choices. The banner’s festive charm will brighten up any room and add a touch of St. Patrick’s Day spirit.
Upcoming Projects and Wrap Up
As we wrap up this project, I’m thrilled to share a sneak peek into some upcoming projects that will continue our journey with unique machine embroidery design.
Future Projects
Next month, we’re diving into a new project that combines both embroidery and sewing. We’ll be creating an adorable embroidered baby burp cloth, perfect for gifting or personal use. This project will offer options for both embroidery-only and sewing-machine enthusiasts. If you are looking for more unique machine embroidery designs like this you might like how I create Custom Christmas Ornament or this amazing zippered bag.
Additionally, I’m excited to announce a collaboration with Melissa from Designs by Little Bee. We’ll be making a charming in-the-hoop zippered bag, complete with a clear vinyl front. Stay tuned for more details and kit availability!
Stay Connected
Don’t miss out on any updates or tutorials! Be sure to sign up for my email newsletter and follow along on my website for detailed instructions and video replays. Your support and enthusiasm make these projects all the more enjoyable, and I can’t wait to see all the unique creations you come up with!
Thank you for joining me on this creative journey. I hope you enjoyed making the 4-leaf clover banner and feel inspired to continue exploring the world of machine embroidery. Until next time, happy crafting!
 Oh Sew Delightful Quilt Bundle for Sew Along, there is also a Fabric Kit for it
 Learn more about my beginner course on machine embroidery, From Start to Stitch
 Enroll in my new course Embroidery Essentials
 Join my Sip & Stitch Squad VIP Membership
 Join my Facebook Group for discussion and help on machine embroidery and crafting
Thanks for stopping by!

The post How To Make Unique Machine Embroidery Design – 4 Leaf Clover Banner – 90 appeared first on Karlie Belle.


